I had a bloke ring a few weeks ago and ask about an ST4S ECU upgrade. I asked him what he was trying to do and he said he had 117hp and would like 130. I asked what his budget was (gives you an idea of their version of reality), and he replied "a thousand dollars". I laughed, which wasn't intentional, and probably sounded a bit insulting, but it was an automatic reaction. It's really not that easy to get a power increase from one of these without spending a lot of money - simply because the bits required cost a lot, as does getting them in. But sometimes, it's also frustrating, because the expensive bits could just have been fitted at the factory during production. It's that frustration which, realistically, forms the underlying rant basis of the below rambling.
Onto the ST4S at hand. I don't have any before runs to compare to the after run below - I did try to get the bike on the dyno before it came apart, but it's not always easy these days and just didn't come together before I had to pull it apart. And comparing to all the older runs isn't really practical, as this Dynojet reads lower than the previous ones Dynobike has had. Realistically, it's probably 12hp or so better at the peak, being nearly 10%.
The thing that has long annoyed me about the ST4 is what it wasn't. Back then, Ducati had this policy that only the SBK of the day got the best engine, and everything else had to wait for it to trickle down. So, for 1999 MY, when the SBK was officially named "996" (even though the factory race bikes were first 996cc in 1996 and the 916SPS had been 996cc from 1997), the older 916cc 4V Desmoquattro engine could be used for something else. Something else being the ST4. Then, for 2001 MY, when the 996R arrived with the Testastretta 998, the 996cc engine went into the ST.
The problem I have is that the ST4 could have been more, made more annoying that it could've been done with bits off the shelf. That's what this is here. Much of the cost involved with this job was related to the age (80k km) and the desire to make it pretty again - painting engines properly is a time and money nightmare. Any sort of blasting of the cases requires removal of all the bearings, etc, so even if they don't need to be replaced, they're coming out and new ones going in once done. On this one, every single case and cover was painted. All those bearings add up.
The actual hotting up wasn't the big part of the job. In terms of bits, the 900 crank and SPS cams were on the Ducati shelf in 1999. As was the 996cc engine. With the 900 crank fitted - its 68mm stroke is 2mm longer than the 996's 66mm - it has 1026cc, and the marketing department could have played on the concept that stroke = torque and less sporty and the journo's just gobble up shit like that regardless of the truth. So it's not like they couldn't have claimed it wasn't an SBK engine at all, and a touring special.
The SPS cams? Well. The thing is, the SPS cams are most definitely the best Desmoquattro cam they ever made (for a road bike anyway). For sure, you can find articles like this one - https://www.odd-bike.com/ducati-916-spsps - where they make statements like:
As such the SPS got a reputation as a thundering, maniacal motor that felt way stronger than the dyno numbers would suggest, with a barely-contained fury at lower speeds that made it a bear to ride in slow traffic. Every review reported stalling at idle. Just like any good 916, then. If you meet a 916 owner who claims they are smooth at low speed and easy to ride in traffic, they are either lying or in the process of having a stroke.
which is just complete rubbish. If you can't make a 916/996SPS idle, you need to stop working on them. The people responsible for setting up the test bikes certainly needed too.
We only sold one 1997 916SPS, but we sold quite a few 1998 models and then, for 1999 MY when the 996SPS became a fully complianced road bike in AU, we sold a lot more. For the 1997 and 1998 models we had to use the Thoroughbred Motorcycles compliance kit originally certified for the 916SP. But once they came with the normal AU compliance plate, it was happy days.
We were right into playing with cam timing by that time, and we found the same sort of results with the SPS engines as we did with the Biposto engines - advancing the inlet cams gave without taking. A well set up 996SPS, with the inlet cams advanced 12 degrees and tuned to suit, was, without a doubt, the best engine in the whole range. Idled like a baby, grandma easy to ride at low speed, went like a rocket (for the time). Dare I say, it would have made a great sport touring engine.
There's always improvements you can make when reassembling one. One thing Ducati did then that they appear to have gotten over these days is provide an excessively safe amount of piston to head clearance. Usually in the 1.4mm range. That can safely come down to 1.0mm, and these days they're pretty close to that it seems. On a 98mm bore 996, dropping the squish from 1.4mm to 1.0mm gives a 0.8 point increase in compression ratio just on its own. Free power right there. Personally, I aim for 0.95 - 1.00mm on customer bikes, although I'd happily go 0.85 - 0.90mm on my own. Just make sure it's warm before you spin it to the top.
And if the crank is out, well, why not stick something else in. The capacity increase with the added 2mm of stroke is only an extra 30cc, which in itself is not really a big deal. But, that extra 30cc gives an extra 0.3 point increase in comp, so now we're up 1.1 points overall. Started with 12:1, now we're at 13.14:1. Daddy loves comp. Done with std 996 pistons too. The crank was balanced to suit its new piston and rod mates. No issues with clearance inside the cases or to the timing shaft (which would have originally been an ST2 part anyway).
The other benefit of the longer stroke is what comes of making it fit. The first one I did I had some custom 1.2mm base gaskets cut - OEM gasket on a 996 is 0.6mm, plus another 0.6mm to lift the cylinder the required 1mm, minus the 0.4mm of excess squish we wanted to get rid of. Later, Bruce Meyers told me "I just add another base gasket", which is typically Bruce - simple and effective. And cheaper - another off the shelf part. I've done that since.
The advantage here is the head is 0.6mm further away from the crank, and the cams 0.6mm further away from the timing shaft. So, instead of losing belt tension when you drop the heads to reduce squish with the std crank, you gain belt tension. Only a little, but it certainly never hurts on these engines. Some of them can be close to not having enough once the belts have some km on them, even as delivered.
More capacity, more comp, less issues.
Reshimming everything is always another associated advantage of having them apart. I typically reduce the crank shimming - I aim for 0.18 - 0.20mm preload with new bearings, and often that seemed to be a reduction of 0.20mm or so from what they came with.
Next it's into the heads. The 996 and 996SPS cylinder head is the same part. As are the pistons, meaning that you don't have to worry about machining pistons for piston to valve clearance. I'm sure Pete Smith had run the inlet cams down to 100 degree centreline on his race engines back in the day with all std bits, so there's plenty there. But, in this instance, I was fitting some 38mm inlet valves. So the pistons went off to Special Piston Services to have the reliefs opened a little. For paranoias sake only, really.
And cams - SPS. Can be hard to find if you want second handies, as everyone else does too. Jan at Redfox Grinta was having some made, but I think the grinder may have passed away? The ones fitted here were Vee Two 604 that I'd had for some time, waiting for a home. This was as deserving as any.
The std cam timing on the SPS engines was 119/107 centrelines, measured with the belts at the "overtight" 11.5 setting on the Lowener tool. These days, I've started setting cam timing with the belts at running tension, being 2.5 on the Lowener or 110Hz. For convenience sake, I'd call 119/107 with tight belts 117/109 with the looser belt setting. Tom Stalebrandt, who spent a few years working at a Swedish dealer and playing with cam timing as opportunity presented, started retarding exhaust cams and would run the Testastretta Evo engines down to 103 degrees without losing any power, so I followed suit.
On this engine, with belts set to "running tension", I set the cam timing to 104/104 degree centrelines. To check the timing, I set it up with straight keys in all the cams. The drop exhaust cam heads fitted to ST and MS4 usually have a 16 degree offset key in the exhaust cams. From memory the horizontal is advanced and the vertical retarded? I forget now. But I checked the timing with straight keys, then pulled the pulleys and headed over to Leigh Farrell's (Cafe Racer) to have him cut some new keyway slots.
For the fuel side, given the ST4S has single injector throttle bodies and I saw no need to complicate matters, I simply replaced the 3 bar fuel pressure regulator with a 3.5 bar part. The extra 0.5 bar gives an 8% increase in fuel flow, all else being the same. The change in flow is the square root of the pressure delta, so 3.5 / 3 = 1.167, and square root of that is 1.08. Or 8%. From previous testing I know a 996 is potentially fuel flow limited from about 9,500 rpm - see the last graph here https://www.bikeboy.org/duel_inject_throt.html So I expected that the additional 8% would be fine for this application.
The 3.5 bar pressure regulator used is Bosch part 0280 160 592, and fits in where the Marelli part sits in the fuel pump plate. Drop in replacement. So simple, even I made it work. For a std replacement 3 bar regulator, Bosch 0280 160 560.
I then made up an ECU file based on my ST4S with cam timing, open airbox and mufflers file, with less fuel at the bottom to account for the fuel pressure increase, and a bit more at the top to account for the cams, valves and capacity. Like that it was pretty good, but once run in went to the dyno for a remap and some numbers.
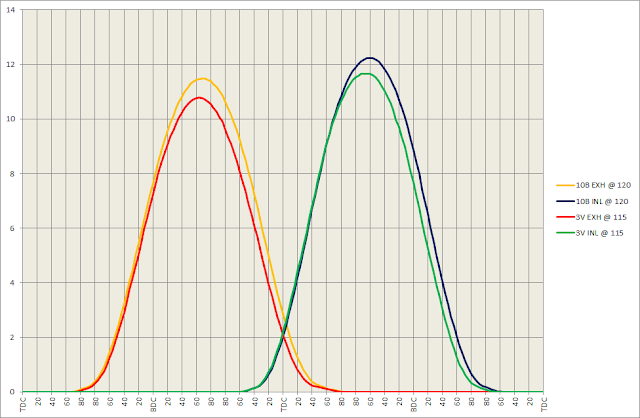
Which leads me, finally, to the graph. No before run to compare it to unfortunately, so I'll compare it to the 992cc ST2 job I did around the same time. Power peaks about 9,350 rpm, which is nice. Very usable. And fast. Standard header pipes, Ducati Performance mufflers, cut airbox lid, maybe a std paper air filter (I'll have to check.), lightened flywheel. For comparison, the ST2 is externally the same spec.
Owner says in a roll on it happily hangs with his S1000RR mates on the road, which I think came as a surprise to all involved.
The part that annoys me the most is, apart from the 38mm inlet valves, this is off the shelf in 1999 bits. Nothing special. Of course, the open mufflers and airbox lid help the peak, but there's no reason they couldn't have delivered a far more serious ST 4V model in 1999 for little effort.
Of course, for the rest of my 1999 MY revisions, the 996 would have SPS cams as well, and the 996SPS would have the 431 inlet cam (1996 996cc factory Corsa) found in the DP catalogue. The SPS exhaust cam, in terms of area under the curve, is nearing the G cam with much more civilised timing. It'd do just fine with the 431.
And it would have made the MS4 a whole different animal. Wheelies into next week.